Previous Tip Back to Tactics/Tips Next Tip
Tips for Cleaning Skulls for a European Mount
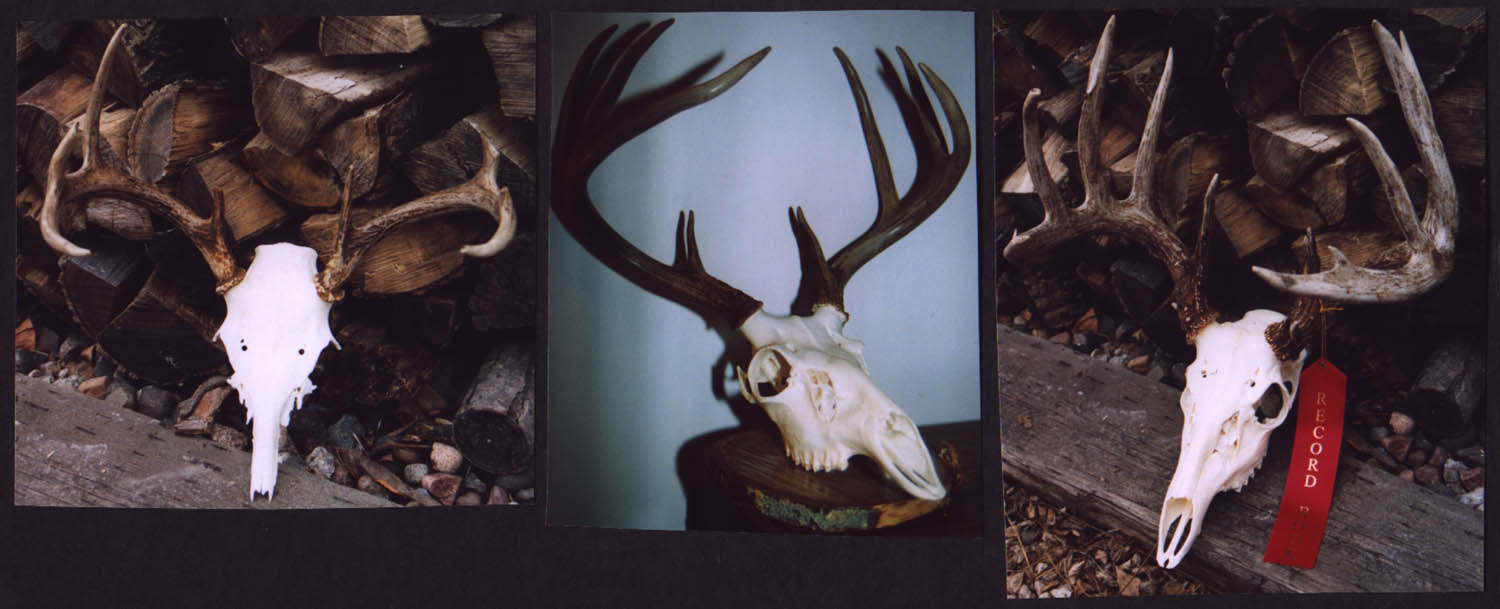
A great way to display a whitetail, without spending a ton of money at the taxidermy shop, is to boil the skull yourself.
Some people like to bury the skull in the garden and put a plastic bag over the antlers to protect them from the elements. It works fine,
but has some drawbacks:
1. You have to wait until spring to dig a hole and another couple months to finish the mount. That's a long time.
2. Neighborhood dogs can have a pretty funny sense of humor sometimes. If it's a giant buck, you'll have a tough time sleeping at night,
worrying about the treasure you buried in the dirt out back.
First things first: skull soup is a stinky, time consuming enterprise that is sure to upset anyone sharing the kitchen. It also ruins a
kettle. It's best to buy an big old kettle at a thrift shop, and take the operation outside in the heated garage with a
hotplate, camping stove or gas grill.
Start out by cleaning the skull with a utility knife, pliers and a flat screwdriver. Wear leather gloves. These will be your tools of the
trade. Designate them as such. You won't want to use these for anything else. Get all the skin off the skull and as much flesh as
possible. The eyeballs will be very difficult. Depending on your decision, the brain could pose a challenge as well. When removing the
head, if you decide to cut through the center of the skull (hacksaw), it'll make cleaning out the brain much easier.
Then, using water and a just a dash of household bleach, boil the skull for awhile.
Bleach isn't necessary. Water alone works fine but a tablespoon or so of bleach
can help to start the sterilization process. Be very careful not to use too much bleach. You do not want
compromise the bone structure of the skull. This was a mistake I made most often when I first started cleaning skulls.
Excessive amounts of bleach will actually will start to eat away at the thin
bones around the nostrils, sinuses, nose plate and eye sockets. Also, this is a
hands-on project. It requires full attention at all times. You'll want to be very careful not to submerge the antler bases into the
liquid. EVER! Even water will start to discolor the bases. Also, I always try to leave as much bark
material and foliage around the bases.
This gives the buck character. With a big spoon, slowly ladle the liquid around the top of the skull and other parts that aren't fully
submerged.
After boiling, start picking away at it with your tools. After you feel like you've made some headway, fill up the kettle with pure
hydrogen peroxide. You can buy this very reasonably at Target or Walmart. Get
about 7 or 8 bottles, totalling about 3 gallons or so. Let the skull soak in this for an hour or so, ladling
the liquid around the skull. Take it out of the bath and start picking at it again. This part takes the longest.
Then, it's back into the soup for another round. This time, heat up the H2O2 and bring it to a boil.
You won't be able to fully submerge the skull in the liquid so, as it heats,
you'll need to continually splash the skull with spoonfuls of the liquid. Not
just a few times, count to about 500. This is the most important step, as
you'll see the skull get very nice and bone white. Make sure to constantly swish the liquid around the different parts of the skull,
taking extra care not to get ANY on the antlers. If you do, spritz it off with some water. It's not the end of the world. Keep an eye on the
burner; you don't want this to boil over.
After a series of cleaning, boiling, picking, boiling and cleaning and boiling...your skull should start to look pretty good. It's a big
project; not something you can get done in one day. Obviously, messing around with brain material and deer glands isn't recommended.
Wash your hands frequently; wear an apron or designate a "skull soup outfit". Then, consider throwing the whole works
(the soiled clothes, not the skull) in the woodstove when
you're done. You'll be left with an impressive, pure white skull display for your bone room. Total cost: $10. Total time:
about 18 hours or so.